Friday, July 1, 2011

Poking Along...Back on track.


Hey All!

Spent waaaay too much time on these fellows but having loads of fun painting faces - more than the rest of the figures I might add. The fellow with the pistol (I'm gonna call him Franz) represents my 'new' face painting technique. I touched-up the face of the officer with the MP-40 (Gunter) but he was painted up over a year ago (and looked pretty bad IMO). I really didn't want to re-do him only make him fit in with the same skin tone.

For Franz's face, I am using a combination of three colors for skin, one for lips, one for cheeks and two shadow colors combined with the skin colors to get various shades. There are many layers and filters and fiddling to get these results so I don't expect to get anything near one-tenth of Tom Wise's numbers but hope to finish my EW German grenadiers and finish up my Soviets this year.

For highlighting Fieldgrey of Franz, I have added Vallejo Sand Yellow 916 (instead of white) and the result is a richer grey/green which I think looks bang on for a little variety. I have seen some color plates that have soldats with various shades of Fieldgrey even in the same unit.

Cheers!

Troy

Thursday, June 16, 2011

A Piece of History

Hey All!


 Look what ma-gotts!!

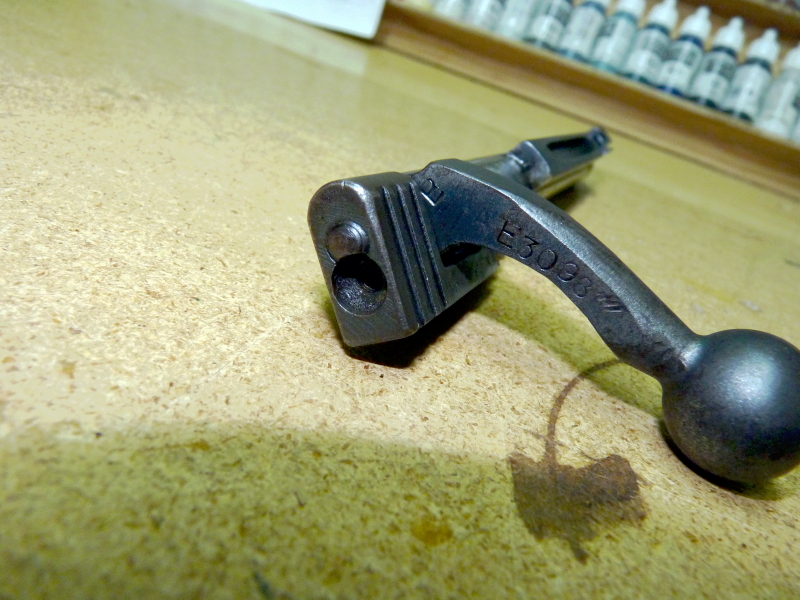
This bad-boy arrived in the mail despite a Canada post strike (sure didn't wanna leave it there!) A vintage WWII 1943 Lee Enfield No.4 Mark I British .303 Serial #AE3098 from the BSA factory in Shirley. Picked it up at a postal kiosk in a drugstore...something sureal about walking through a store with a gun under your arm...!

It's in incredible shape for its 68 years with only a single missing screw in the end of the cocking piece. The bore is pretty good shape too and I plan on firing it soon. Anyone know where I can get a replacement screw?


I dissasembled it immediately on arrival and discovered 68 years of dirt and grime was held in check by the cosmoline packing grease. There is virtually no rust or damage to any iron although the bluing is wearing on the wooden grip steel oval clamps. As well, some donut-head had installed the front clamp upside down (see ad photo below) and over the guide lugs, slightly denting it. I peened the dents out and have been considering picking up a replacement.


If your looking for one and have a spare 350-400 bucks (they still have 22 left), check out Frontier Firearms in Saskachewan Canada @ http://www.frontierfirearms.ca/
I stripped the stock and re-oiled it with doubled-boiled linseed oil. It has a slightly blonder colored stock vs the front grips but it really looks great! I have ordered a strap via ebay and sadly, an oiler and pull-through as these where missing.

Cheers!
Troy


EDIT Postscript: Above is the video of me shooting the Lee Enfield today - "Dasani had it coming!"

Replaced the missing screw and went to the local range. I test fired it from the hip first (in case it went boom). What a KICK!! And LOUD!!! Even with hearing protection. Man, to have to rapid fire this gun in combat must have been deafening and hard on the shoulder!

The target was 75 yards away through the open sights. As this .303 has battlesights (300 and 600 yard flip peep type), my first 2 shots were high but pretty much on so I dropped a few inches each time until round number 3. I cannot imagine hitting anything at 300 let alone 600 yards!!!

Too cool!

Troy


Monday, June 6, 2011

D-Day Anniversary

Hello All.

It was on this day, 67 years ago, that this young man like thousands of others, laid down his life for his family, comrades and countrymen...

Lest we forget...

Troy

Sunday, June 5, 2011

Plane Tree Base Color

Hey All!


As promised, some progress pictures. For the base color, I settled on 1 x drop each of Vallejo 875 Beige Brown and 825 German Pale Cam Brown. I thinned this with 2 x drops of plain water and painted all of the smock areas and any spots that would be in shadow or contact with equipment. Try not to get on the flesh and other areas but, shit happens. If thinned properly, your paint will flow to all the recesses and give a natural shadow/highlight with the white undercoat.

I then added a *smidge of 822 German Cam Black Brown (or any dark color, hell even black) and wet out the mixture again. Paint this onto all heavy crease areas and edges of the smock. Try not to get this on the highlights.


*smidge...like a dip in the tip of the bottle with a small brush.
 
An interesting note on the right NCO: He was modelled with rolled up sleeves but his left arm was enormous! Must have been an arm wrestler or real  lonely! I pared this down to a more normal-sized shape but as I looked the figure over I realized that the sculptor had made a bit of an error. The figure is supposed to be wearing a smock over tunic (as are all the other figures in the blister confirmed by the tunic collar showing through) but I cannot imaging rolling up the sleeves of the tunic as well as the smock in that fashion. As well it appears as if the back of the figure shows the split in the tunic - not the straight edge of the bottom of the smock. It could be the tunic showing out the bottom but that looks unlikely. If the tunic was to be sculpted instead of the smock, then there should be pockets of which there are none. Hmmm...


Cheers,


Troy

Tuesday, May 24, 2011

SS-Schütze primercoat

Hey All!

Had some time to look over the box of EW SS German Infantry from Battlefront's  GE791 SS Panzergrenadier Platoon and picked out a rifleman to start the show. These are a pretty good-looking bunch of Nazis, uniforms and equipment are accurate and sharply detailed. These sculpts suffer the same bobble-headed, somewhat ogre-ish features - but - I like it!
I plan to paint up a single figure to get the plane-tree scheme down. Sure makes it easier to start again in case the painting looks like crap! You only gotta clean up an entire platoon once to learn this lesson! ...been...done...

Clean-up the figure by removing all flash lines and gluing it down to a roofing nail or some such to avoid handling. Wash in water/dishsoap to remove mold-release agents. I started by priming in white, cheap, spray paint - not primer - as it is too thick. Use a VERY thin coat and examine your mini once done to see if you missed any areas or left any flash. The primer will help you see these missed areas and you may have to lightly reprime once done. Once done, I put into the oven for 15 minutes at 170C (lowest setting on her stove) to dry and cure.

CONGRATULATIONS VANCOUVER!!!
(nice goal Kevin Bieksa!)

Worked ahead to see how this will look - will post a step by step later...your thoughts on the pattern?


Cheers,

Troy