Wednesday, October 19, 2011

Building Based.

Hey All!


Finished the first piece of modular terrain for my Ost front boards last night; its a Russian farmhouse and garden.

The piece is based on a 6" x 8" 4mm hardboard covered with tile grout/pva for soil and various flocking materials for vegetation. I used a chunk of indoor/outdoor carpet for the base of the garden and cut-up bamboo skewers for the fence pieces (still have to wash and drybrush). The bamboo is surprisingly strong even when split. The building is made from cut-up coffee stir sticks and is based on pictures of Russian WWII-era farmhouses (although a thatch roof would be more correct).

I spaced the terrain features to allow a medium base to fit on any side of the building to ease miniature placement. A simple idea could be to allow any miniature placed on the terrain base to benefit from that terrain type thus no need to balance the minis on top.

I will be working on some roads and other buildings next.

Cheers!

Troy

Saturday, October 15, 2011

Ost Front boards and BF Quality.

Hey All!

I have been busy reworking the boards and am feeling a little better after the effort. The original idea was too uneven and I decided to add a layer of river sand over the original surface. I still feel that a larger grain sand would have been better as the texture isn't as prominent as I wanted but I want to move on to the modular pieces so decided to leave good enough alone (so unlike me...).

I painted the new PVA/sand layer once dry and washed with dark brown ink. I then drybrushed the original color. On came a sparse flock layer to represent Eastern front muddy, dusty Russian steppes. Eventually I will be building a gully board, and maybe a stream. Roads, wheatfields, villages, and forests will be modular overlays.  Really very easy, the only time consuming part is the waiting for each step to dry!

The color difference in these pictures is with/without the flash.

I think the main issue with creating a playing surface is that it still has to be just that, playable. I really like the look of those non-modular boards (think Shawn's Terrain) that represent a specific chunk of the real world but can you game on them? I imagine trying to place infantry in and on the terrain would be trouble. As well, you are limited to gaming the same terrain over and over again (unless you have lots of time to make LOTS of terrain).  

Placing miniatures can be a challenge. Some terrain features can be easily overcome (removable trees and the like) but rubble and buildings are not so easy.  Ultimately, I would like to do some Red Barricade/Stalingrad boards but still have to decide how to make them playable. Perhaps a removable building footprint that can be occupied with infantry?

A comment from 'TT' on the blog entry WFT! got me to thinking about the recent Battlefront figures/models. I did get a letter back from BF regarding their poor EW stuff but it did not address the issue of quality. Instead only promise's to impress me with new Evan Allen sculpts. True, there have been some great looking new sculpts most notably GE742 Schützen Platoon (Afrika) and Matt Bickley's GE832 Gebirgsjager Platoon (in a word - WoW!) but we are still left with VERY poor EW sculpts. Anton Ducrot  (who designed the disastrous EW figures) new casualties figures are a contradiction; face detail is good, scale, pose and everything else are not! It is such a shame to EW gamers/collectors that our period suffers the honing for his skills. Battlefront should re-do the EW sculpts. Period.

Cheers!

Troy

Tuesday, October 11, 2011

Three Muddy Boards

Hey All!

Work continues on the terrain boards...


I decided to make the boards 18x36" instead of 24x48" as this allowed me to both transport the boards easier and clean up the edges of the 4x8' sheet once cut - it was getting beat up in the garage! Also the smaller size didn't require any center support. I added 2" strips of 3/4" plywood to the edges and joined everything with 3/4" brads and carpenders glue. The boards are super sturdy and have zero warp. I think the 24x48 boards would have been better for the larger games but I can see making a river board, a major hill board and the like so there will eventually be a bunch more boards to make big maps.

I then covered the surface with my mixture of tile grout, sand, PVA, brown house paint and a bit of water. I found this was very durable when dry. I used a roller to apply a thin coat of the mixture to the entire board. Once dry (1 day) I added a dark brown wash made with ink and water. Once this dried (again 1 day) I drybrushed all the boards with the original brown paint. I created a few dusty areas by working in extra paint (see top photo).

The texture is pretty rough but as most of this will be under the flocking, I am not too worried. One issue with terrain I struggle with is that the better looking your terrain is, the harder it is to play on. As well, when adding modular terrain on top, you want the base surface to be flat - VERY flat. For that reason, I will probably NOT add grass tufts or rock piles to these boards but instead will add these features to the modular pieces.

Cheers!

Troy

Wednesday, September 28, 2011

The Dirt

Hello All!

Moving on to the paint and texture for my terrain boards, I had Canadian Tire mix up a Quart of a dry-mud color paint that I have in Decoart craft paint called Soft Suede. I use it for earth color on my bases so it will match nicely. Cost was $17.00 loonies. Hope it will cover 3 2x4 boards...maybe should have bought the gallon?

My research has found that most people do 3 steps; a sand/PVA glue coat, followed by a paint coat, followed by a PVA glue/flock coat. I wonder if this could be shortened to 2? I began by experimenting with paint, river sand, tile grout and PVA.

 The middle is a red/brown tile grout mixed with straight paint. I found it was too easily wiped off when dry. The right side is a mixture of river sand, paint and PVA glue. While it was durable, the uniform sand did not give the texture I wanted. The left side is tile grout, paint and PVA and again, it is too uniform.

The pic above is a mix of all; PVA, paint, grout and sand and looks the best to me. I stabbed it on with a big, old paintbrush to avoid the streak lines that the earlier tests found. Once dry I will test out its durability.

Cheers!

Troy

Tuesday, September 20, 2011

Terrain on the Brain.

Hey All.

I have been thinking about building terrain for about a year now and as we head off into another loooonnng Canadian winter, I think its time to get started.

My 15mm armies (German and Russian) have been shelved for the time being as I begin this project but will be worked on again soon...

In doing research, I came across a cool product from Litko - plywood hexes! Originally designed as miniature bases, they can be purchased in 100 lots for 15-25 dollars depending on size. Pretty neat idea, building modular terrain from these (more durable than GHQ styro, and fit looks tight) but setup and design may be a bit time consuming. I have done GHQ hex terrain in the past and it can be a pain keeping the map from shifting. A fellow blogger has a good write-up here:

http://smallworldproductions.blogspot.com/2008/05/hex-appeal.html


I have looked into a bunch of methods but have decided to go with 2' x 4' x 4mm hardboard backed with 2" x 3/4" plywood strips on edge for support. Onto this I will place terrain pieces (village, woods, hills and fields) to be based again on the 4mm hardboard. One problem with this method is below ground level terrain (rivers and gullies) but I think I may be able to make a river board by adding below grade banks and water.

The 2'x4' size should be small enough to transport to gaming cons and still large enough to have a good sized game on with 15mm. As well it means only a single cut on the table saw as the hardboard comes in 4'x8' sheets.

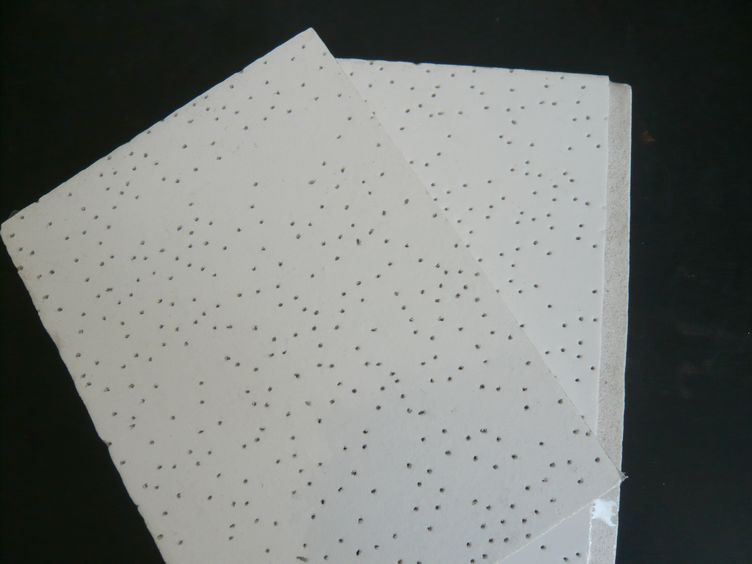
I originally was going to use paper/celulose based ceiling tiles as these can be easily sanded, gouged and painted but they are too flimys and need to be based on hardboard for strength. As well the edges are prone to damage even when painted with PVA and I am not sure they wouldn't warp anyway.
 I also looked into blue SM styro insulation but it is very expensive and its also pretty flimsy, again needing to be supported. As well, it has health issues when sanding and as it is waterproof, it does not take paint as well as the old 'pink' SM did.

Stay tuned!

Troy